There’s a lot involved in running a successful Amazon business. From choosing the right product to sell in the first place to staying one step ahead of the competition, marketing your products, and constantly testing and improving, there’s always something to do.
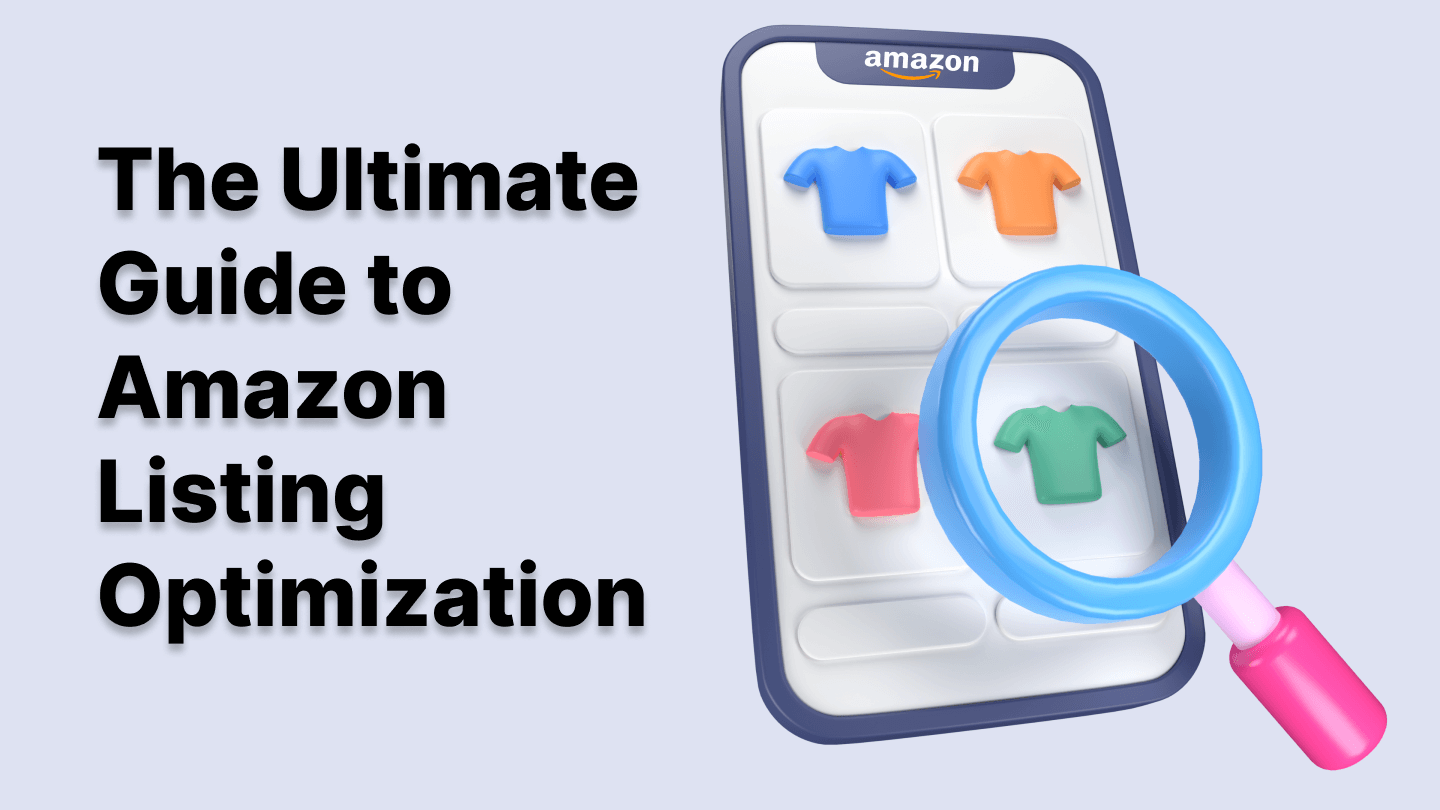
But you won’t get very far without employing effective Amazon listing optimization strategies.
Finding the perfect product to sell is just the start. Even if you find the ideal product, you want to make sure it stands out and attracts customers.
Part of that involves optimizing it for Amazon’s A10 algorithm to increase the visibility of your product listings on the Amazon search engine results page.
There’s a lot that goes into optimizing your listing, and it can seem like a mammoth task. In this guide, we’ll go through all the steps you need to take to optimize your listings, from the listing title to the product images and the price.
So you can ensure you’re set up for success on Amazon by getting more visibility and making your product more appealing to customers.
TL;DR
- Amazon listing optimization is essential if you want to increase traffic to your listing and boost sales.
- There are several key factors to focus on when optimizing your listing, including keyword research, the product title, bullet points, product description, images, search terms, and pricing.
- You should also focus on getting positive reviews and answering questions to optimize your listing further.
- Explore Amazon advertising to get even more customers to visit your listings.
- Listing optimization involves continual testing and improvement if you want to see the best results.
Why Is Listing Optimization Important?
Let’s be really clear about why listing optimization is important in the first place. After all, you don’t want to spend hours optimizing your listings if it’s not going to get you the results you want.
There are two key reasons:
- Boost Visibility – Listing optimization is all about optimizing your listings to rank higher and getting more eyes on your listing.
- Increase Sales – You also need to convince shoppers to buy your products. If you optimize your copy and images, you’re more likely to build trust and encourage shoppers to become buyers.
So, you should focus on optimizing your listings to drive more traffic, increase visibility for your products and brand, and increase your conversion rate.
Otherwise, the other work you put into running your Amazon business will not pay off in the way you’re hoping it will.
The Amazon A10 Algorithm
Amazon has its own search algorithm, and the latest version is the A10 algorithm. This is similar to Google’s algorithm in that it attempts to connect shoppers with what they’re searching for.
Obviously, there’s a lot of competition on Amazon. You can help yourself by optimizing your listings to rank higher in the search results.
There are lots of factors involved in ranking well, but having an optimized listing is one of the most important. Also, the algorithm is updated all the time, just like Google’s algorithm, so it’s important to keep up to date with all the latest changes.
Key Factors to Consider When Optimizing Your Listings
To optimize your listings, you need to focus on all of the following key factors:
- Keyword Research
- Product Title
- Key Product Features
- Product Description
- Images
- Backend Search Terms
- Pricing
Next, we’ll go through all of these in detail. You can optimize your listings in any order you want, but the best place to start is keyword research.
1. Keyword Research
Any Amazon listing optimization should begin with keyword research. By choosing the right keywords at the start, you’ll be doing yourself a big favor and saving yourself lots of time in helping your listing rank.
Keywords need to be relevant. When shoppers are searching for your product, which words will they use?
You want to find out and then use the keywords in your listing, but especially in the right places (which we’ll talk about later).
There are many ways to find the most important keywords to use in your listing.
- Brainstorming
- Product research
- Third-party tool
Brainstorming
This is the simplest option but perhaps the least accurate. It can, however, give you a good starting point.
Brainstorming simply involves thinking about what you would search for if you were looking for your product as a customer.
What would be the first thing you would type into the Amazon search bar?
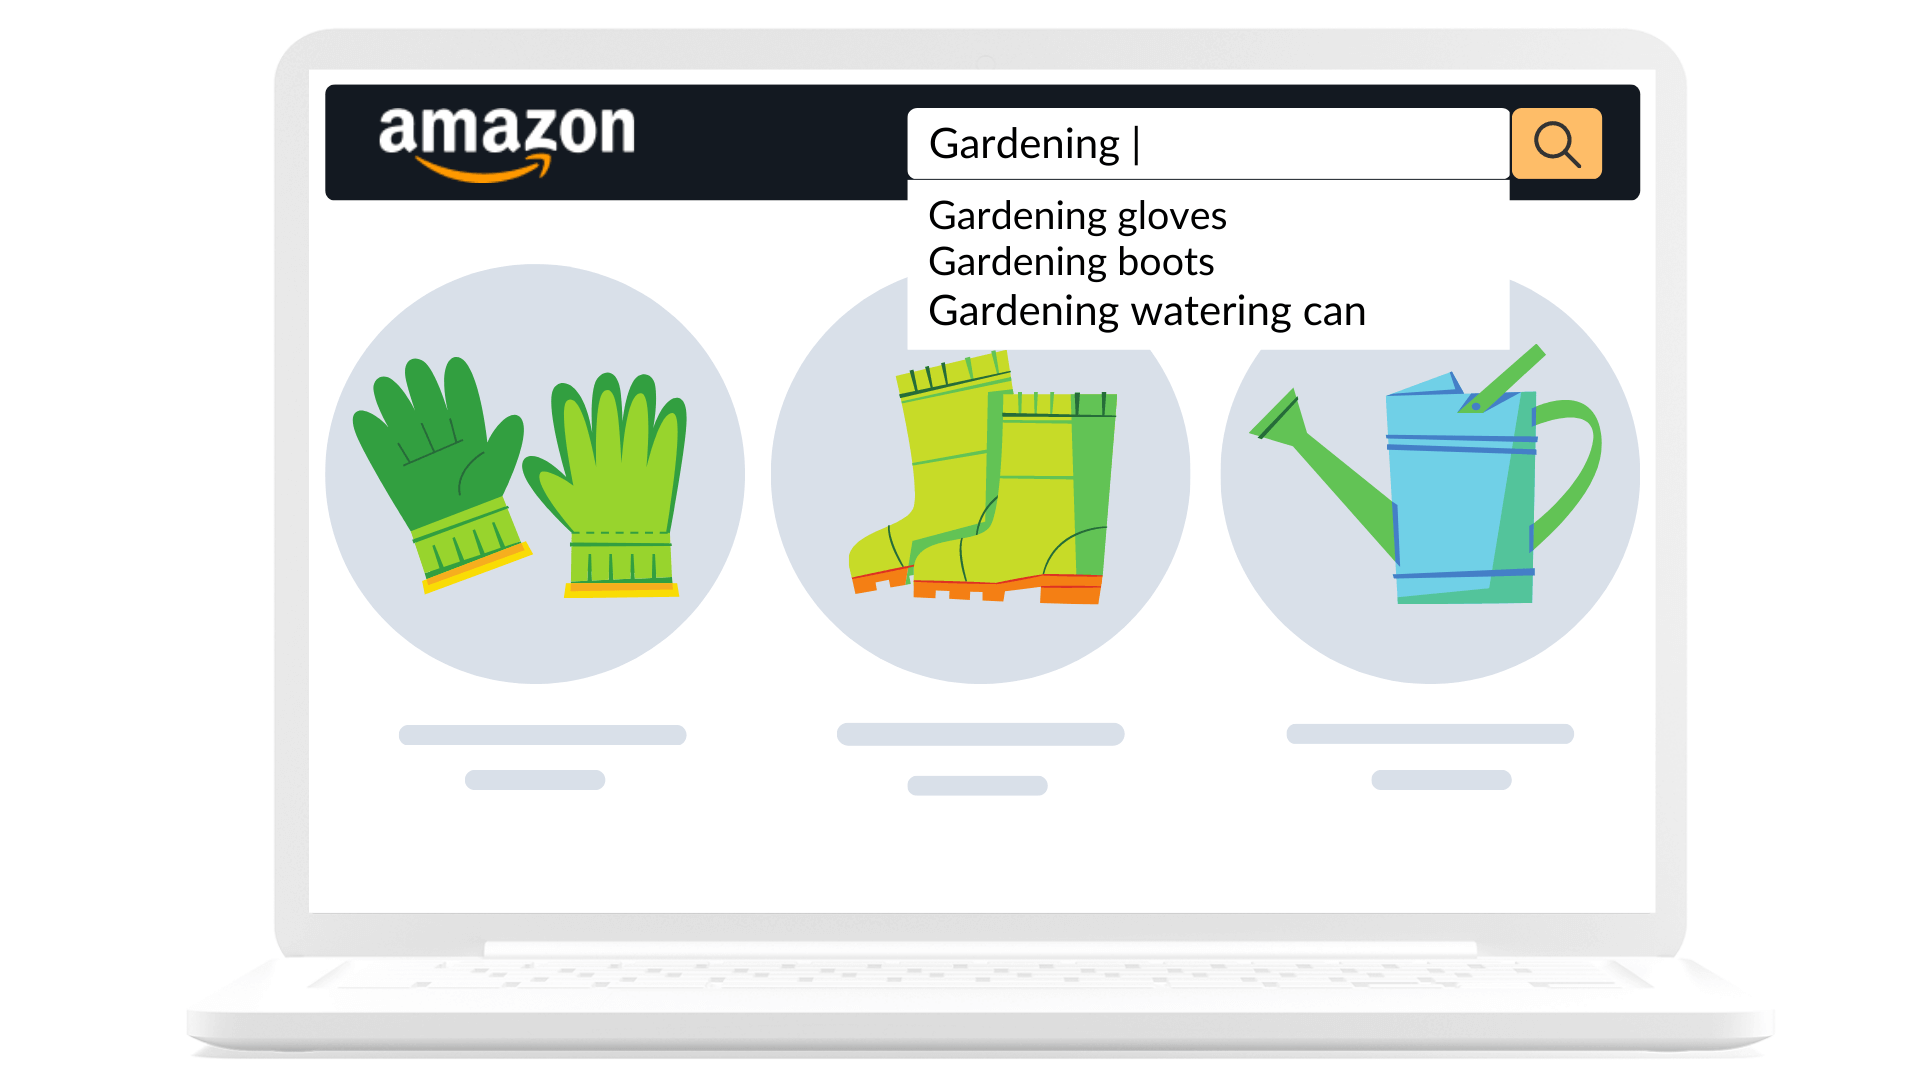
Try it out. Type a few words into the search bar, and you’ll see Amazon’s own suggestions. These can give you more ideas for your own brainstorming efforts.
Keep a spreadsheet of your keywords and add to it when you think of new ideas.
Product Research
Product research is similar to brainstorming, but this time you use actual products that appear in your searches.
Start by typing in a keyword that you think customers would use to find your product and see which listings show up in the results.
Go through the results and take a look at the product titles, then pick out the most important keywords that these products are using in their titles. These are likely to be relevant keywords because they’re being used by high-ranking products.
Again, make a list in a spreadsheet and add any new keywords you find to your list.
Third-Party Tools
While the above options can help you to get some ideas, it’s far quicker and easier to use a dedicated Amazon keyword research tool.
You’ll have to pay to use these tools, but the time they can save you in finding the best, most relevant keywords, can make a huge difference—especially if you’re optimizing several listings.
There are several to choose from, including MerchantWords and Keyword Scout. They’re all slightly different, but they usually involve typing in your product type or a competitor’s ASIN and generating a large batch of keywords.
You may want to sign up for a few and use their free trials to help you decide which you prefer.
Not only can you find hundreds or thousands of keywords, but you can order them by importance, highest search volume, which are ranking well, relevancy, and more.
You’ll find both long-tail keywords and short-tail keywords. Longer keyword phrases are more specific and less competitive, while search volume for shorter keywords tends to be more competitive.
Most of these tools will also provide advertising costs for the keywords, which we’ll look at later.
Get Searching
Whichever method you use, it’s important to spend some time on your keyword research because it will affect the rest of your optimization efforts.
So get brainstorming, or sign up for one of the popular keyword research tools and start forming your list of keywords.
Related: Complete Guide To Amazon Keyword Research in 2024
2. Write an Optimized Product Title
Now you’ve got your keywords, it’s time to move on to what’s arguably the most important part of your listing: the product title.
This is not only the very first thing that shoppers will see when your listing appears in the search results—it’s also important for Amazon SEO.
The title tells the A10 algorithm what your product is about, so you should use the most important keywords from your research.
The algorithm looks at the title to work out whether your product listing is relevant to the search. Getting the keyword optimization of your title right can have a big impact on your listing’s visibility.
Make Your Title Long
The first thing to do is make sure you use as many of the most important keywords as you can fit into your title.
Most listings are allowed 200 characters, but not all, so check the rules for your listing. This is all-important listing real estate, and you should aim to use as much of it as you can.
People expect to see long titles on Amazon that contain the information they need. They’re not looking for a title like that of a blog that sparks curiosity—they want information.
The most important keywords in your list will tell you the sort of information shoppers find important.
Don’t Keyword Stuff
Should you just plug in all your keywords in any order? No, this would be keyword stuffing. While you want to use as many as you can, you also want your title to be readable.
Remember, while it should be optimized for the algorithm, it should also make sense to human shoppers and appeal to them.
Keep It Clear and Compelling
Make sure your title is clear, and avoid using words that are confusing. This will just turn people away.
If your product is a multipack, make this very clear. Include details about the product quantity and size as well as the most important features and who it’s for.
After the brand name, use your most important keywords and provide details about the size and quantity, the product’s primary purpose, use cases, benefits, and any other specifics that are relevant.
Follow Best Practices
There are several best practices you should stick to with your product titles:
- Capitalize the words apart from articles, conjunctions, and prepositions.
- Use numerals instead of writing out the numbers (“2” instead of “two”).
- Avoid subjective words like “top seller,” “amazing product,” and discount words like “sale.”
- Break up the keywords and specific points with pipes (|) or dashes (–) to make long titles more readable.
Spend Time Perfecting Your Title
Creating the perfect title is not always easy to do. But spend time over it because a good product title will keep selling your product for you for years to come.
Remember, you only need to use a keyword once in the whole listing for it to be counted by the algorithm. So you don’t need to say it again in the bullets and product description unless you want to, and you won’t get any more points for using it multiple times.
Ultimately, your goal is to get your product listing ranking but also to get the click. Once someone clicks on your listing, you can persuade them with the copy and images.
It’s all about getting the balance right, so spend time on your title and look at what other products are doing to get some ideas.
3. Key Product Features
The next most important part of your listing is the Key Product Features section, also called “key features” or simply “bullet points.”
Many people who click on your listing will not read past the bullets, so make sure these include your most important information.
Just like the title, you want to use the most important keywords in the bullets where they have a greater impact on the algorithm.
You can use up to five bullet points. Again, this is all key real estate, so make sure you use all of them.
Remember, if you have used keywords in the title, you don’t need to use them again in the bullets. It may make sense to use them, so you don’t have to avoid them, but the main goal here should be to include other keywords.
How to Write Bullet Points
There are no set rules about how to write bullets. However, many product listings feature a key feature or benefit of the product in capital letters, followed by a more detailed explanation.
This is where good copywriting practices come into play.
You want to persuade shoppers that your product is worth parting their money for and show them how it will benefit their lives. Your goal is to convince them that it’s a great choice while subtly including the most important keywords.
Here are some important things to remember:
- Bullets should contain the most important information that people will want to know. That means the size, quality, materials, colors, etc.
- Avoid using empty phrases like “high quality.” You have to show them why your product is of higher quality.
- Make sure you communicate your message clearly. While keywords are essential, don’t let the message get lost amidst a focus on keywords.
- Keep them clear and concise. Bullet points should be a maximum of 1,000 characters for all five bullet points together.
- But don’t feel like you have to use all the characters. It’s good to make use of the available space for keywords, but you can keep them shorter if you prefer.
- Make the top bullet points the most important features and benefits you want to get across
Again, this is a skill that can take time and practice to master. Everyone has their own way of writing bullet points, so do what works for you. Check other listings to see how they present the key product features for inspiration.
4. Product Description

The last part of the listing that involves creating copy is the product description.
You can use up to 2,000 characters for this. Again, you should try to make use of all the space available to fit in as many relevant keywords as you can.
Rather than focusing on the benefits in bullet point form, here you have more room to go into details and be more descriptive and persuasive with your language.
Keywords are still important, but they’re given less weight in the product description than in the title and bullet points. You should have used your most important keywords already in the title and bullets, so the description is where you aim to use the rest.
Use Persuasive Copy
While you should use any keywords you can reasonably fit in, focus more on providing information and convincing your customers to buy.
- Show why your product is superior to the others.
- Use a friendly tone and highlight any features that didn’t make it into the bullet points.
- Reiterate the main selling points and any information that’s important for shoppers when making their decision.
- Avoid promotional language and subjective phrases. Focus on facts and details.
- Break it up into sections. Rather than one long block of text, use short sentences and paragraphs, and make it easy to read.
Try to get across how yours can be used to make the buyer’s life better. Explain the best way to use your product to get the most out of it, and show how it will impact their lives in a positive way.
Research Other Listings
Read other product descriptions, preferably for your competitors. Which ones stand out to you? Which descriptions make you want to buy?
Don’t copy them, but try to pinpoint what it’s about, the most effective ones that make them better. Use the same techniques in your own listing.
Go into details, including the materials, colors, packaging, and anything people would want to know.
Use Reviews & Questions
When you start getting reviews, use these to help you optimize your product description further.
People may highlight features that you didn’t think of but that are important to them. Talk about these features in the product description.
Use the same idea with questions and answers. If you’re asked questions regarding information you had not thought to include, make sure you include this in the listing somewhere.
Check for Accuracy
Finally, double-check spelling and grammar. People will be put off by obvious mistakes because it suggests you don’t take care when it comes to running your business.
The whole description should make the impression that you care about your customers and their experience. It should show them that you can be trusted.
5. Images
While the other factors relate to copy and keywords, image optimization ensures your product listing has the right visual impact.
Use Professional Photos
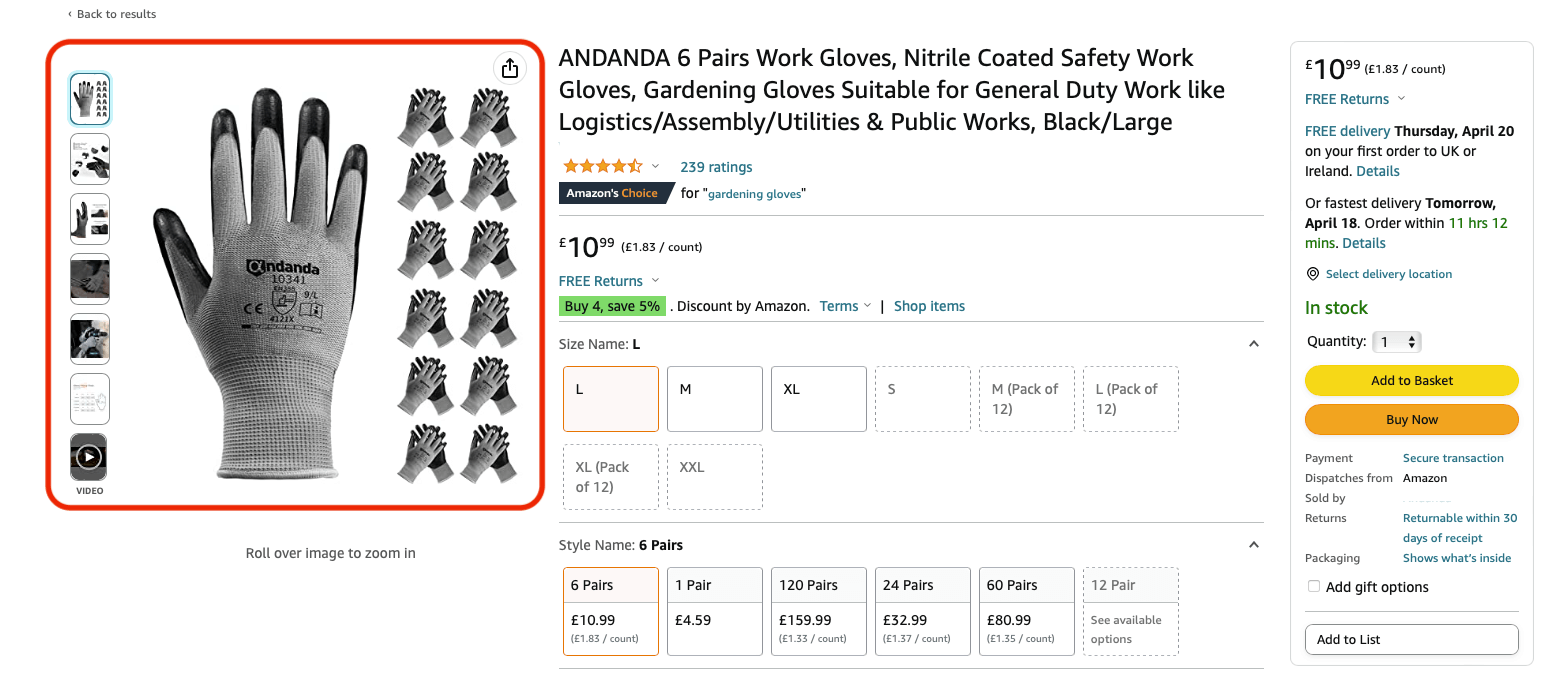
The first thing to remember is to use professional images. In the same way that errors and spelling mistakes in your copy will turn shoppers away, bad-quality images will do the same.
Blurry photos show that you can’t be bothered to use the best images and don’t give a lot of confidence. They can reduce trust and negatively impact conversions.
So take professional photos. You only have to do it once, and your images will continue to sell your product for years, more than making up for the cost of the photography.
Stick to the Guidelines
Ensure you meet all of Amazon’s requirements regarding images. You need a main image, and you should choose it carefully. It should show the product clearly on a white background.
All images should be clear and contain information about the product. They must accurately represent the product and match the product title.
They should not be too small. They should be 1,000 pixels wide and 500 pixels high. For the best experience, images should be 1,600 pixels on the longer side. This is to ensure the optimal zoom works so shoppers can zoom in and see details.
Also, the product itself should fill 85% of the image or more, and there should be no blurry parts or pixilated areas in the image.
Use as Many Images as You Can
You should also use all your permitted images. You can currently use up to seven images in total. This can change, however, so find out how many you can use, and aim to use as many as you’re permitted.
Show the product from different angles. People want to feel like they’re holding it in their hands.
Show the product’s size. Rather than just listing the measurements, place your product next to an item that people instantly know the size of or show someone holding it in their hand.
Use Lifestyle Images
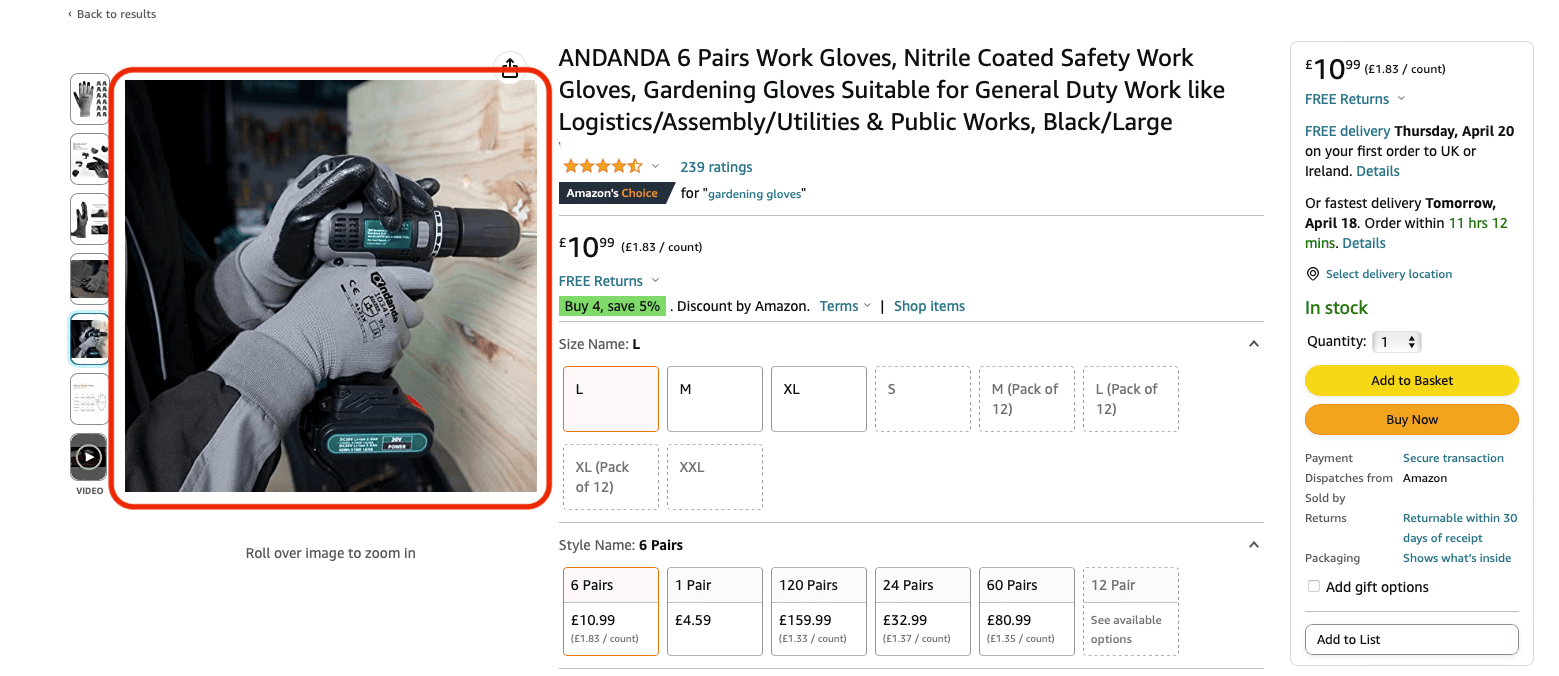
Try to include at least one lifestyle image showing your product in action. For example, if you sell a dog toy, show a dog running in the garden and grabbing it.
This can help your potential customers to imagine themselves using your product.
Use Infographics
You can also add information to your images to help the buyer by giving them visual information.
For example, you could highlight the features and benefits for shoppers who don’t want to read the bullet points.
Related: How To Structure Your Amazon Image Gallery For Maximum Conversion
6. Backend Search Terms
Hopefully, you’ve used all our main keywords in your title, product features, and product listing. But you may not have been able to fit them all in.
Helpfully, Amazon provides you with Backend Search Terms, also known as backend keywords, so you can add the most important keywords into this field.
There may be many keywords related to a product, but Amazon doesn’t want sellers to cram their listings with every keyword they possibly can. So it gives you an area to include your other relevant keywords without resorting to keyword stuffing.
You can add up to 250 bytes to this field, and a byte is equal to one letter or number. Do not go over 250 bytes. If you do, none of the keywords will be used.
You should aim to fill this field with all the remaining terms that do not appear anywhere else in your listing. Remember, there’s no benefit to including keywords more than once.
You could also use this field for synonyms and abbreviations but don’t include misspellings.
Don’t worry about including punctuation: instead, just separate keywords with a space. Also, don’t use stop words like “for” or “an.”
To find this field, go to your Amazon Seller Central account and head to “Inventory.” Then go to “Manage Inventory,” choose your listing, and go to the “Keywords” tab.
7. Pricing
Finally, let’s talk about pricing. The right pricing helps to optimize your listing. If you do everything else right and create an attractive, persuasive, and keyword-optimized listing, a tempting price can be the final piece of the jigsaw.
Once you have created the title, for example, you won’t need to change it unless your testing shows that you should change it.
Pricing, on the other hand, is an element of your listing that you can—and should—change regularly. As in multiple times a day.
Competition is fierce on Amazon, as you no doubt are well aware. People go to Amazon expecting to find the best price, and they will often choose a product based on its price.
You want to make sure your products are as competitively priced as possible while still being able to make a profit.
There are several ways to go about this.
Compare with Other Listings
You could simply look at competing listings, find out what sort of prices they’re selling for, and make yours more competitive.
Work out the absolute minimum you could sell your item for, and ensure you’re still making a profit after accounting for all your expenses.
But pricing is something you want to keep a close eye on. While you may check your competitors’ prices at the start and use them to set your own competitive price, be aware that prices change all the time.
If you want to ensure your product remains competitive, you’ll have to keep on changing the price. That involves making it less expensive and then putting the price up again when appropriate.
This is where a repricing strategy comes in.
Automatic Repricing
You could do your repricing manually. This involves changing the listing on your own. But even with a small number of listings, this quickly becomes impractical.
It can take a long time to check all your competitors’ listings and act accordingly on your own price.
Instead, many sellers prefer to use an automated repricing tool like Repricer.
Repricer takes over your repricing activities for you and automates the process so you don’t have to worry about a thing.
Just decide on a repricing method and then set your rules, including your minimum and maximum prices, and let it get to work.
It will keep track of all the competing listings and will know as soon as their prices change. Then it will act accordingly, changing the price of your product to remain competitive. And it does it all incredibly quickly.
Whatever you decide on, make sure you pay attention to pricing because it can make a big difference to your overall results.
Related: The Ultimate Guide to Repricing on Amazon in 2024
Other Optimization Tips
The above seven factors are the most important when it comes to optimizing your Amazon listings. But there are several other things to keep in mind.
Read on for more optimization tips to help you get the most from your listings.
Get More Reviews

Reviews are absolutely essential on Amazon. They’re a powerful form of social proof, and they help to give customers confidence in your product.
While the seller will always say positive things about their own products, customer reviews help to give shoppers more confidence.
Lots of negative reviews can have a negative impact on your sales, but the opposite is true if you have positive reviews.
After you have optimized your product listing using all of the above factors, make an effort to get more reviews. This can be time-consuming, but it’s well worth it. Even with a badly optimized listing, you can still make sales if your reviews are good.
You can also use your reviews, as mentioned previously, by taking information from them and using it to optimize your listing.
If some people leave a negative review because they thought your product was larger than it actually is, make sure you’re clearer about its size in the listing, perhaps by using a better image.
How to Get More Reviews
If you sell a great product, you should get positive reviews naturally. This is the most important factor.
Amazon will also send an email requesting a review following the sale to help encourage customers to give their feedback.
But there’s also a “Request a Review” button, and you can use this to send a one-time review request.
You can do this manually, and if you only have one product, it may make sense. But if you have multiple products and you’re making dozens or hundreds of sales, this is something you may want to automate.
There are several tools you can use that send out automatic review requests via email, so these could save you some time.
Our sister company, FeedbackExpress is designed to help you set your review generation on autopilot. This allows you to target positive feedback with smart selective requests on Amazon, eBay, Trustpilot and more.
Use Vine
You could also consider signing up for the Vine program. If you’re just getting started with a new product, this is a good way to get your first 30 reviews.
Respond to Reviews
You should also respond quickly if you receive a negative review. You may be able to offer a refund or replacement, and the seller might remove their feedback.
Answer Questions
Just like reviews, the “Questions & Answers” section gives you another opportunity to optimize your listing by updating it.
People will ask questions about your product, and you should answer them as quickly as possible with as much detail as you can.
Even if people ask questions that you have already clearly answered in the listing, don’t show your frustration. This can put people off.
When you answer questions properly and professionally, they can be a great way to not only build trust with the specific shopper asking the question but also with other shoppers browsing your listing.
If they see that you’re active and willing to help, this gives them trust and makes it more likely that they will choose your product.
Lots of questions and detailed answers could help to improve your rankings. But use them for more than this.
They’re also a great way to get into your target customer’s head. What sorts of things matter to them? What do they want to know before buying a product?
If a question keeps coming up, you may not have made the information clear in the listing. Just like with reviews, take the information and improve your listing.
Make the Copy Engaging
We’ve touched on this already, but it’s an important point. Your listing’s copy should make use of keywords to improve your rankings. But it should also be engaging.
You want to form a connection with your customers. When they visit your listing and read through the copy, you want them to feel compelled to buy it.
Speak to them like real people and empathize with their needs and wants. Answer their questions before they ask them, and use a friendly and professional tone while highlighting the benefits of your product.
Paint a picture for them about what life will be like with your product, how it will solve a problem they’re facing, and how it will make life easier for them.
All of these are essential when it comes to effective copywriting, and they really can make the difference between getting a sale and not.
Use A+ Content
Continuing from the previous point, there’s one way you can help to make your listing really stand out from the crowd: use A+ Content.
While standard listings consist of copy and images in the image section, A+ Content allows you to create a listing that incorporates design elements, including images, titles, and copy sections, to present the information in a more compelling way.
It used to be called Enhanced Brand Content, and you’ve probably seen it on other listings. If you want to use A+ Content, you’ll need to be enrolled in Brand Registry, so it’s not for everyone. But you should at least consider it.
You’ll be able to choose from several layouts to help distinguish your listing and make it unique.
You can also add your branding, use even more images, and bring the listing to life. Make it into an appealing description of your product and get additional space for copy to help it stand out.
This could help to improve your rankings and sales if you do it properly.
Explore Sponsored Listings
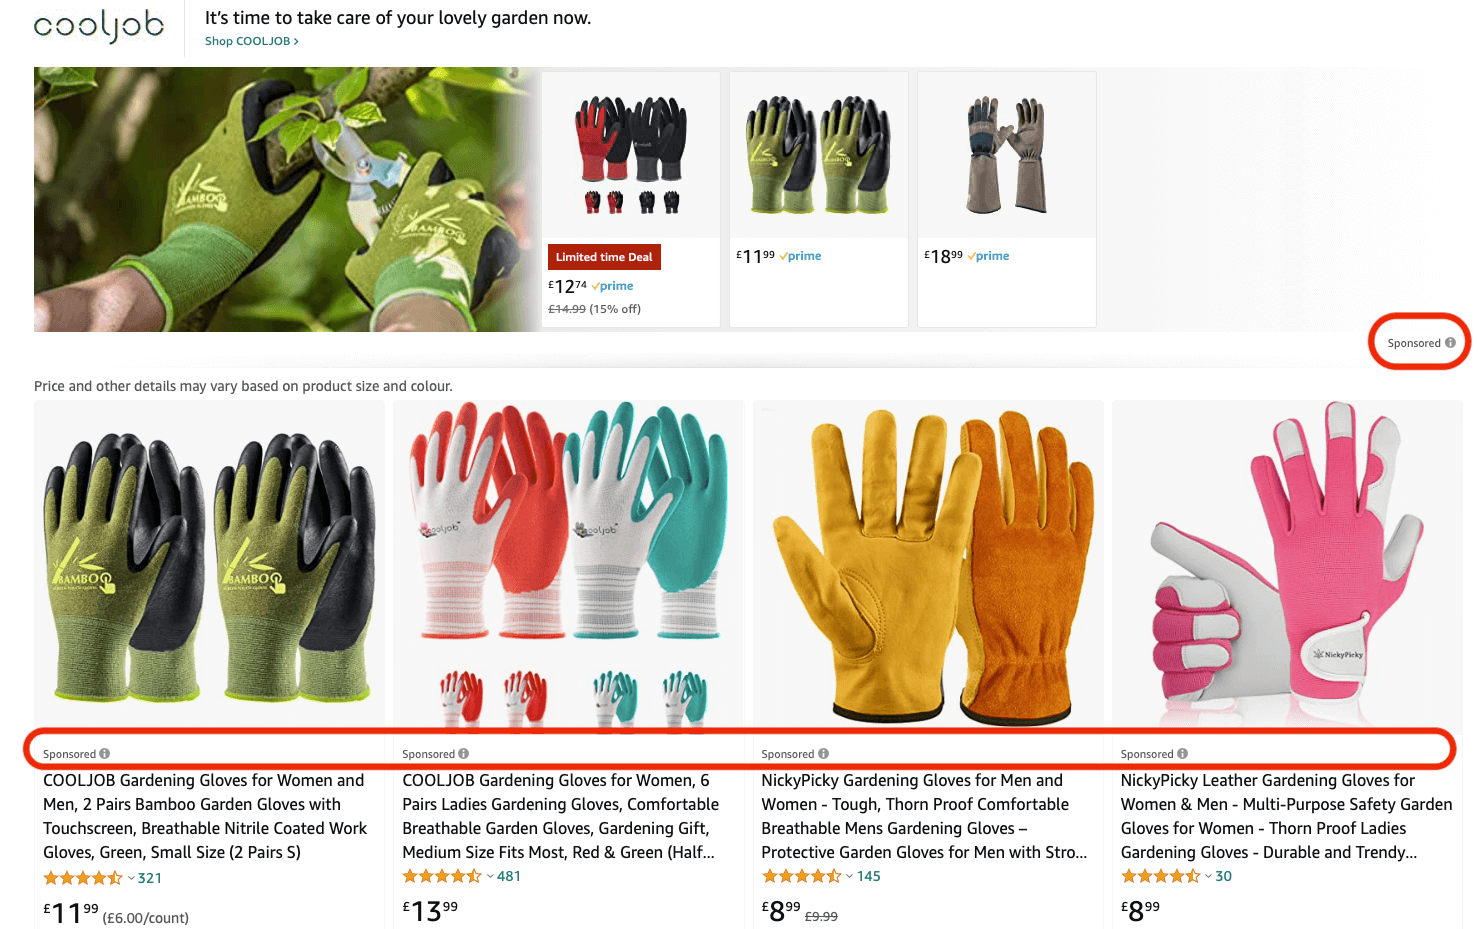
We mentioned Amazon advertising briefly earlier when discussing keyword research.
When you’re researching keywords, many of the tools you can use will provide information about the cost of certain keywords and how competitive they are, and this is information you can use in your advertising campaigns.
Why mention sponsored listings here? Because Amazon listing optimization is all about getting more visibility for your listings and generating more sales.
Amazon advertising can give you a fast-track option by getting your listing to appear higher up in the search results where more shoppers will see it—and, hopefully, click on it.
There are several advertising options: Sponsored Product, Sponsored Brand, and Sponsored Display ads.
You’ll probably begin with Sponsored Product ads. These are PPC ads where you pay when someone clicks on your ad and visits your listing.
They’re the simplest and most straightforward option, and they can give your listing a serious boost.
You may want to do this at the start before you have many reviews to get more sales and positive reviews. And then, when your listing appears higher up in the search results, you can stop advertising.
Or you might continue to advertise—it all depends on your strategy.
But don’t dismiss the idea of paying for visits because it can pay off. In a competitive marketplace like Amazon, it could give you the headstart you need.
One thing to remember is that if you use advertising, don’t ignore listing optimization. It’s just as important. Shoppers still want to see high-quality images and optimized titles, and you should include the main keywords just as you would if you were not advertising.
This can help to improve your advertising results, reduce costs, and increase conversions.
Related: The Complete Guide to Advertising on Amazon in 2024
Test Your Listings
Finally, Amazon listing optimization is not something you can set and forget.
If you follow the strategies in this guide, you’ll make your listing better than the vast majority of listings out there with a great title, appealing images, and convincing copy.
But don’t stop there. Optimization is always about constant improvement.
Just as repricing is something you have to do all the time to keep your products competitive, you should not set your listing and forget it once you’re happy with your level of optimization.
You can use tools to test different versions of your listings and make improvements.
For example, Amazon allows you to do this with its “Manage Your Experiments” feature that you’ll find in Seller Central.
Carry out A/B tests using this tool. This is where you create two versions of your listing with one difference. It could be the product title, the main image, or the bullet points, for example.
Test the different variations and compare the results. If one gets noticeably more sales, you’ll know to use this version.
Update your listing accordingly, then test another element. By doing this, you can continue to enhance your listing and make improvements that lead to more sales.
Testing is important because it’s often difficult to know exactly which elements will make the difference. You may think that one image will lead to better results, but the opposite may be true. You won’t know until you test.
So use data to make your decisions, and continue to update and enhance your listing over time to get more conversions and boost profits.
Conclusion
Amazon listing optimization is something every seller needs to consider. You may have the best product in your niche, and you may put in hours of work to get more sales. But if your listing is not optimized, you won’t get as much exposure in the search results—and you won’t make as many sales.
Follow the steps outlined above. Carry out detailed keyword research, then optimize your product title, bullet points, product description, images, and search terms.
Get a good repricing strategy in place, focus on building positive reviews and answering questions, and use the information to improve your product listings. You may also want to explore Amazon advertising.
Then keep on updating your listings to optimize them further, and do everything you can to get more sales and make your Amazon business a success.
